External Wall X-Clad Brick Slip Cladding System

Due to the fact that traditional stonework or bricks are no longer practical nor beneficial since usually not easy to install, quite heavy and provide little if any structural stability, thin and lightweight brick slips are growing popular.
Well aware of this fact, but also of the need for improved insulation and thermal performance of interior and exterior walls, a carefully designed brick slip system that comprise of a few useful and compatible elements that offer not only a neat and elegant finish, but also other important benefits including insulation contributing to improved energy efficiency and environmental protection.
Click here to view the colllection of 3 main Brick Slips ranges with over 50 colours to choose from!
Components
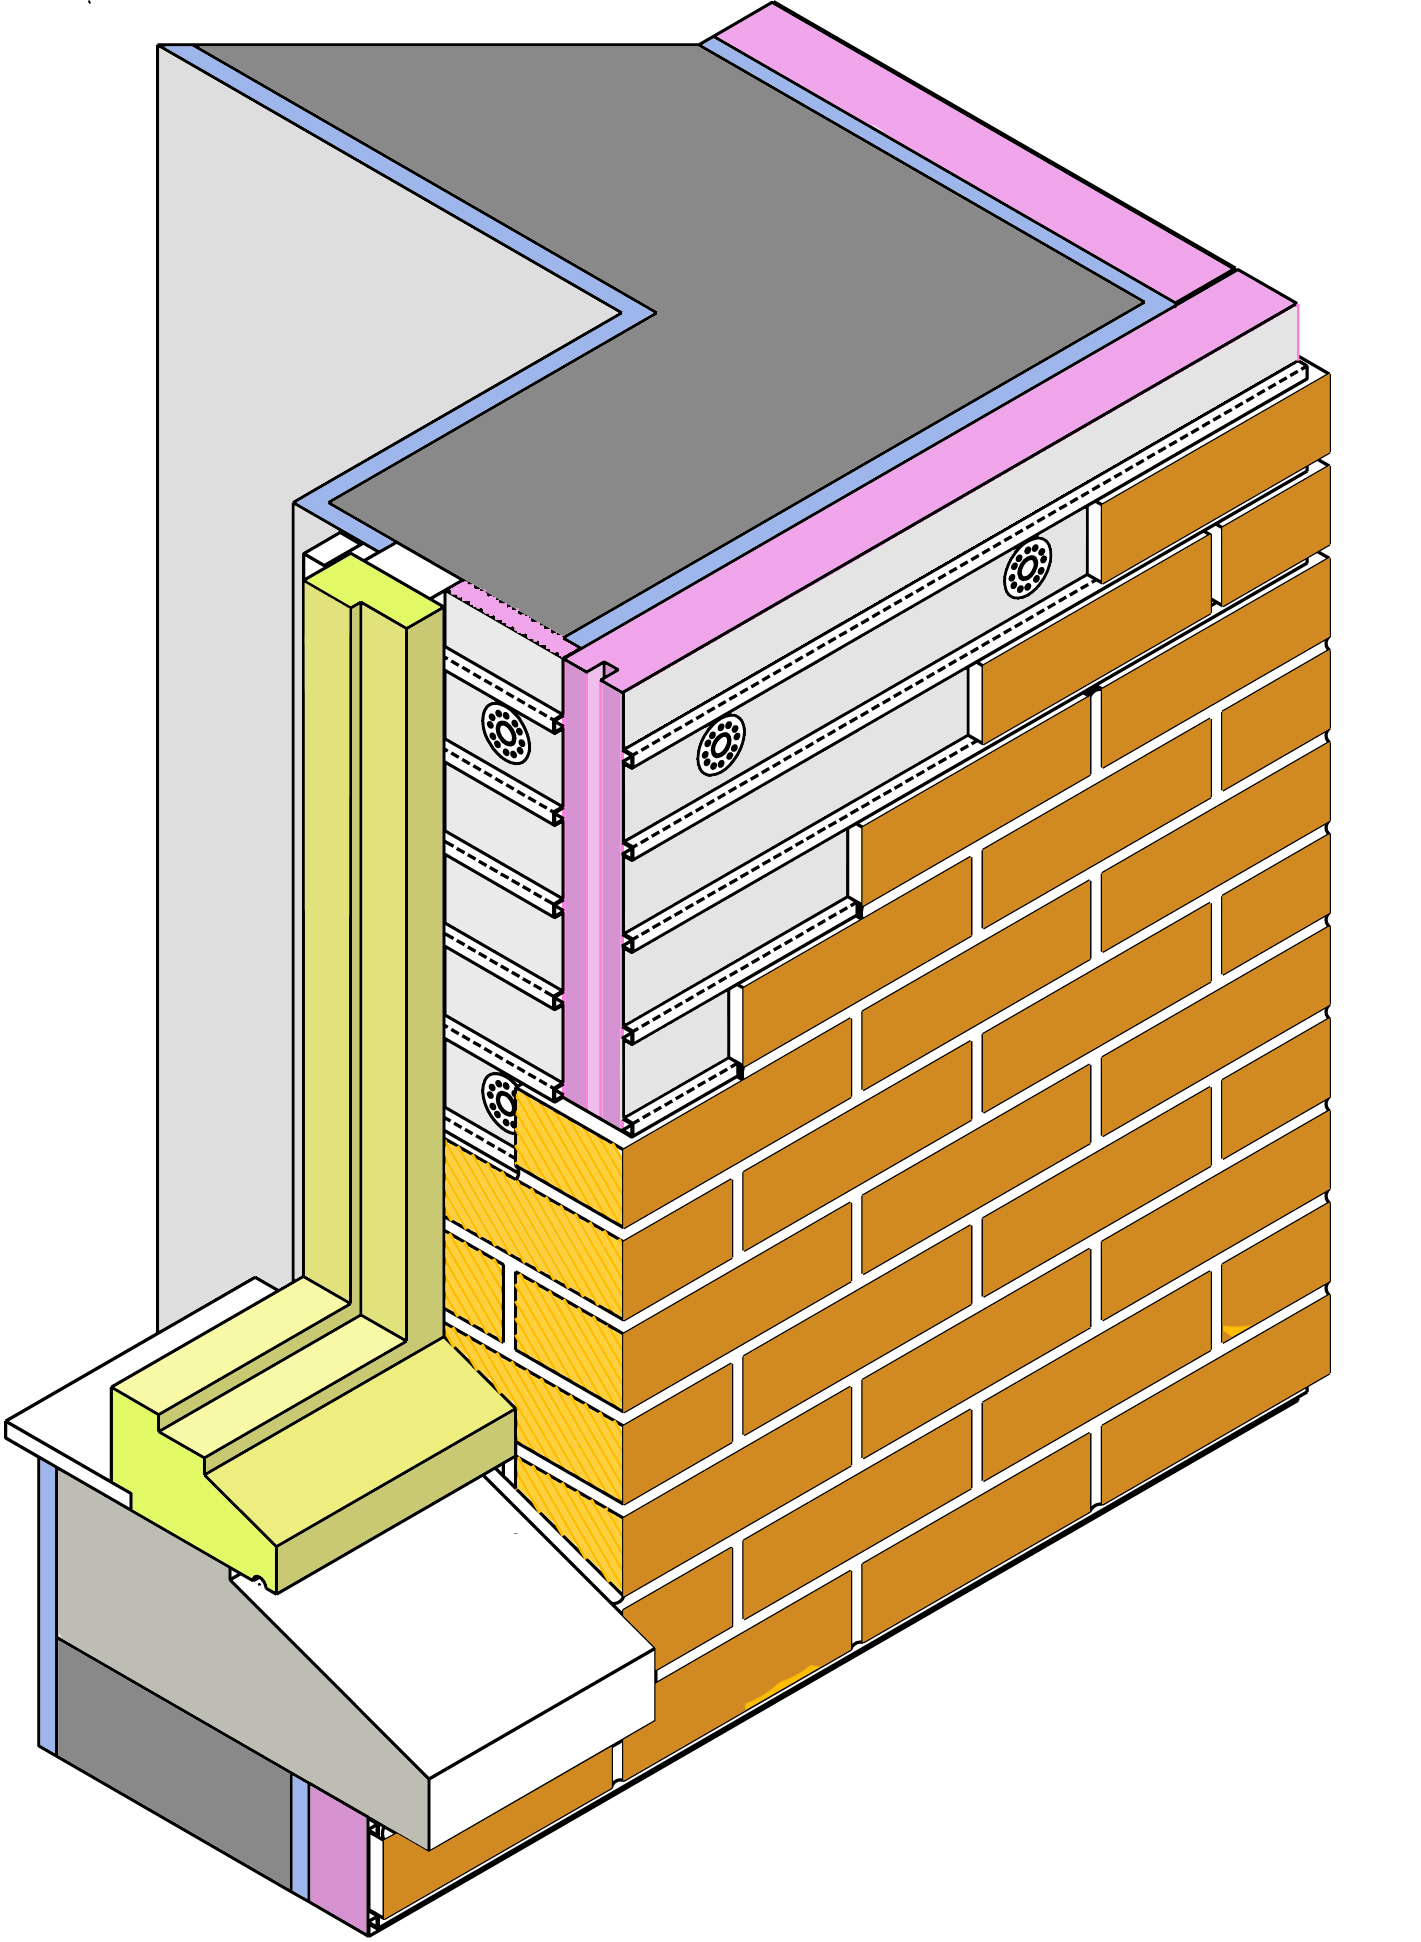
Brick slip system includes the following components:
-
a panel made from a 0,6mm extruded polystyrene waterproof skin bonded to either gypsum plasterboard (12,5m) or extruded polystyrene insulation (17mm, 25mm or 50mm), overall nominal size of 1.2m x 2.4m. Although the thickness of the insulation layer can be increased, we recommend that you better opt for a thinner panel as a part of the brick slip system and rather combine it with some external wall insulation board, offering better thermal performance and insulation power, but at lower costs.
- brick slips that are laid onto the panels, offering substantial water absorption of 5.5% to 9%, depending on the type chosen. You can choose from an extensive selection of lightweight, durable and resilient brick slips categorized in three available ranges:
- Britannia range includes fired extruded slips in standard UK size, also available as corner and angle stone slips, manufactured in a number of different colours, from traditional red and orange shades to modern white and black patterns.
- Classic range includes handmade stock brick slips in standard UK size, specially designed and cut to fit the system, available in a whole range of colours, from discrete pale yellows to more intense and dominant bright reds.
- Bradstone range includes reconstructed stone brick slips that are specially designed to be used on both entire refurbishment or new build projects or only to provide an architectural detail, manufactured in a number of different colours and styles, also available as corner and angle stone slips.
-
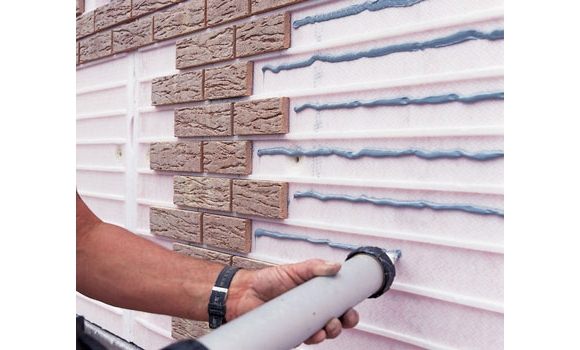
polyurethane adhesive
-
fastener
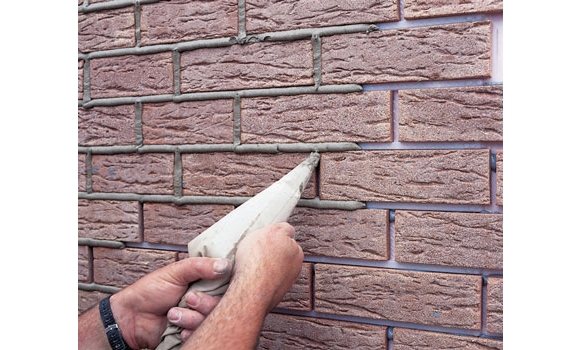
- cement based mortar, especially developed for pointing mortar joint in both brick walls and brick slip systems. The mortar is able to adhere to different brick types, with no shrinkage risk, designed to be used with different brick absorbency and joints widths. It can be applied either by bag injection or by gun and is available in seven standard colours, only expanding its versatility and application. It contains less then 0,002% of chloride and conforms to BS 5628 Part 3.
Application
The brick slip cladding system can be used in both internal and external applications, due to the system versatility. We herewith provide two basic variations for both applications:
- X-CLAD can be used both internally and externally, since it includes extruded close cell expanded polystyrene, available in different thicknesses in order of meeting different requirements, offering improved water and weather resistance, when compared to alternative insulation forms.
- I-CLAD is specially designed for internal application, including a plasterboard backer panel very easy to install and fix directly to the stud work, whenever insulation is not necessary.
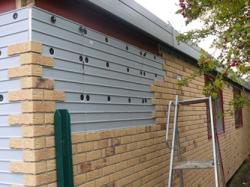
Installation
This X-Clad wall cladding system can be installed on a number of surfaces, (including existing or new walls) such as concrete, masonry, timber frame or metal constructions, as long as they are properly flat, dry and stable to support the imposed loads. All the components of the system must be properly stored and protected from external effects (such as high temperatures and rain) prior and during construction.
-
The first step in installation involves positioning and fixing the insulation panels onto the wall surface. All the panels installed must be carefully butted tightly together, all potential gaps sealed with an adhesive and all horizontal tracks of the panels precisely levelled. When installing the panels, depending on the dimensions of the wall, make sure that the fixed panels are properly covered with brick slips so they would be protected from the UV rays and weather conditions. If any panel remains uncovered, it must be properly covered with opaque sheeting, however covered with brick slips and pointed not more than seven days upon installation. The panels are installed horizontally and vertically from the first panel and properly secured with adequate fixings and available fasteners. The type, location and the number of fasteners used shall depend on the type of brick slips system applied. However, the heads of the fasteners must be fixed flush with the skin, in order of avoiding slips misalignment.
-
The brick slips are applied onto a dry and clean panel surface and at adequate temperatures that should not be below 3ºC. Basically, the temperature will affect the adhesive open and cure time (in conditions of high humidity, the curing may be premature which can affect the adhesion of the slips onto the panels). The slips should be installed starting from the most visible outer corner. Then the brick spacing and layout should be determined, whereas the optimal joint width is 10mm. The adhesive is then applied to the panels from the top edge of the brick spacing, making sure that it is broken at the taped joint and placed over every washer head. Prior to adding the brick slips, it is important that they are dry and clean, when they are pushed between the track ribs.
- Mortar pointing can be undertaken only if the temperature exceeds 5ºC. The mortar is mixed with some clean water, whereas 25kg bag of mortar should be mixed with about 4.5 litres of water. The grout should be first applied to horizontal bed and then vertical joints, making sure not to cover too large area, since this can cause the mortar to stiffen. The grout is tooled only when it has set firm. Tooled joints should be left to settle for at least 10 to 15 minutes, when stiff bristle brush is used to brush the brickwork.

There are no products to list in this system.