


")

")


How to Install Marmox Thermoblock

Thermoblock Installation Done Properly
A high quality building and insulation material will not do you much good if it is not handled and installed properly. Due to the fact that we believe that installing insulation material is just as important as choosing one, we herewith offer some advice on how to easily and correctly install Marmox Thermoblock. Namely, what you need to understand is that apart from the very installation process, there are also some other factors that you need to take into account in order of being able to have the entire picture and do the job correctly. Although the safest solution is to always hire a professional contractor for the job, sometimes the planned budget will not allow you to do so, why you will try to save some money on the installation. Well, this is why we are here to help you and provide assistance each and every step of the way.
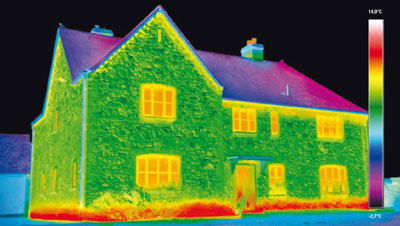
First of all, you need to know some basics on the Marmox Thermoblock that will help you make up your mind. We are talking about a highly effective construction blocks that have high insulation power and provide a level of moisture resistance. They are used to cover the base of the interior leaf of the exterior wall, usually laid in one row, next to each other. If handled and installed properly, the blocks will allow you to upgrade the thermal performance of the wall construction, lower the carbon footprint and achieve Level 4 of the Code for Sustainable Homes and lower your utility bills by reducing energy consumption within your household, which is usually caused by thermal bridges appearing across the wall, due to the different thermal conductivities levels. Well, Marmox Thermoblock is especially designed to prevent or at least reduce the risk of thermal bridging appearing in the exterior wall.
Marmox Thermoblock Installation
Now that we have discussed some basic advantages of Marmox Thermablock, it is time to move on the installation process. The first thing you need to know is that the blocks are delivered in carboard boxes, why they need to be properly protected and stored on a level and dry area. The good thing is that, once installed, the blocks need no additional maintenance, since they are properly confined and are very durable, able to follow the life span of the wall.
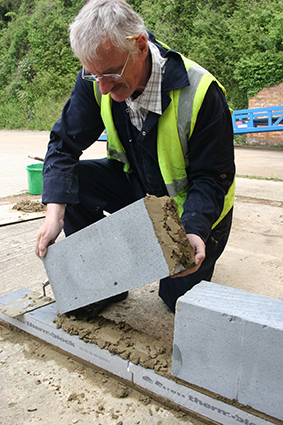
When installing Marmox Thermoblock, follow these instructions:
- The blocks should be laid over the damp proof course onto the standard bricklaying mortar which needs to be evenly spread over the entire surface of the blocks, bricks or concrete. Note that, depending on the outside ground level, the blocks can be laid either over or under the damp proof course. Make sure that the mortar used is of adequate designation class, in accordance with the proper BS standard. The mortar should have uniform thickness in order of providing a flat and even surface for the blocks.
-
the blocks are installed onto the wall base so that their level coincides with the ground floor level insulation and does not exceed the level of the adjoining floor.
-
the block should be pressed into position and tapped down until they are stable and level, whereas make sure that the blocks are laid tightly beside one another and that rebated ends are tightly butted.
-
in case water ingress is expected, water tightness of the Marmox Thermoblock can be upgraded with the use of proper acrylic sealant on the rebated joints, ran from the top to the bottom of one block exposed vertical and horizontal edge. Once this has been done, another block is tapped into the mortar and pressed, so that surplus sealant can be squeezed out.
-
when you reach the end of the row, in case the last block needs to be cut to size, use the hacksaw to cut between the concrete cylinders and a rotary-bladed cutter to cut through the cylinders.
-
the blocks can be laid on top of each other only if the concrete floor is stepped. In this case, use a nominal 100m bond overlap (make sure that it corresponds to the thickness of the block at least), so that the concrete cylinders of the top block coincide with the cylinders of the bottom block.
-
finally, another layer of standard bricks and blocks should be laid on top of the Thermoblock, using soft mortar, making sure that the weight of the top layer is evenly distributed over the entire surface of the blocks. In case indented or hollow bricks are used, the hollow must be facing upwards.
Another valuable information is that the blocks are not classified as hazardous, but is advised that when cutting the blocks, a face mask should be used in order of providing protection from the dust that could reach your mouth or eyes. In case of a contact, make sure to wash your eyes thoroughly for several minutes.
Order Marmox Thermablock online on Insulation Shop and get a free quote for your insulation project and a fast delivey. For any additional information contact us through our live chat support system or send us an email to info@insulationshop.co.