


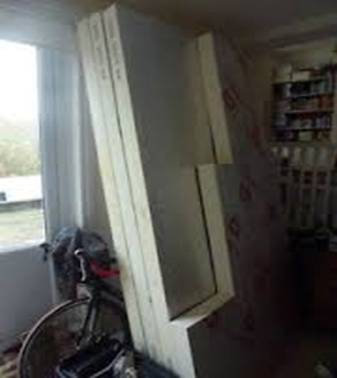
How to Insulate Your Internal Walls using Celotex GA 4000 Insulation Board

Wall Insulation Solutions
Your home walls are probably the weakest points within your home and deserve proper insulation and protection the most, due to the fact that walls are under the influence of a number of various external factors such as cold and heat, moisture and damp, not to mention that wall are suppose to be strong and resilient, able to withstand imposed loads and hold the entire construction. This is why you need proper insulation, regardless of whether you are dealing with solid masonry, timber frame or steel stud frame walls, external or internal wall insulation. Well, the good news is that there is a single solution for all the mentioned variations, found in Celotex GA 4000 insulation boards, which are quite versatile and can present a great solution for your internal wall insulation.
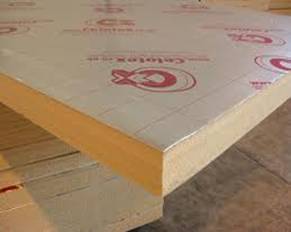
Celotex GA 4000 insulation wall boards are PIR boards, consisted of a rigid core and aluminium foil facings on both sides, made in standard 1200mm x 2400mm size and thicknesses from 50mm to 100mm. No environmentally hazardous blowing agents were used in the manufacturing process, why the boards have 0 ODP and low GWP, classifying them amongst eco-friendly products. For more information on the boards characteristics and advantages, please refer to the first article from our series or the product description, available on the Insulation Shop pages.
This article will be dedicated to Celotex GA 4000 boards in wall insulation, so in case you are in need of a proper protection for your walls, you have come to the right place.
Installing Celotex GA 4000
Solid masonry walls
If you are dealing with a solid masonry wall, with no wall cavities (thus cannot be insulated internally, but only externally), and are looking for a solution that will not influence the size of your interior space which is generally the case with external wall insulation, then Celotex GA 4000 can be the right thing for you. These boards will greatly reduce the risk of thermal bridges formed by mortar joints.
The boards need to be installed onto a sound and clean surface of the wall, whereas any large projections need to be removed and loose material cleaned off. Note that the downpipes will have to be temporarily removed and can be relocated once the installation process has been complete, if required.
Locate the starter batten and drip at minimum of half of a brick above the installed damp proof membrane and fix it onto the wall surface with appropriate screws and plugs. Once the fasteners holes have been drilled install the Celotex insulation wall boards directly onto the substrate via adequate fasteners, making sure that all joints are butted together and all end joints staggered. A breather membrane should be fixed over the insulation material, with at least 100 laps. Treated timber battens should then be installed vertically over the breather membrane and insulation boards.

When adding a render finish, stainless steel lathing needs to be fixed onto the battens and chosen render system then applied, in accordance with the given installation instructions. When installing tiles, apply tilting fillets at horizontal junctions and fix tile battens to the vertical ones, when the tiles can be hang in accordance with the manufacturer’s instructions. Finally, note that other lightweight cladding systems can also be installed onto the vertical battens.
Timber frame wall lining
Celotex GA 4000 boards also present a great solution for timber frame wall lining, due to the fact that they offer a thin solution, improved thermal insulation, provide service cavities and can reduce the risk of thermal bridging, especially if installed in two layers.
Prior to installing the boards, you need to ensure that rails and studs are flush and all services properly installed.
The insulation boards need to be inserted into the framing and pushed to the plywood sheathing. The services can be fit into the cavity, if necessary. The boards need to fit tightly between rails and studs and the unprinted foil surface facing the air cavity. In order of making sure that there are no gaps in the insulation since this can influence the thermal performance of the entire construction, use off-cuts at wall abutments and make sure that the continuity of insulation is maintained with the floor perimeter insulation. Finally, install a vapour control layer over the studwork warm side and fix plasterboard lining over, using adequate fixings.
Timber frame wall sheathing
Installing Celotex GA 4000 insulation board in timber frame wall sheathing prevents interstitial condensation, providing voids between studs to accommodate services and encapsulating the timber frame.
The boards need to be installed onto a sound and clean surface of the wall, whereas any large projections need to be removed. The boards are installed to the external sheathing at 400mm centres in the centre and 300mm centres on the perimeter of the board, via galvanized clout nails.
The fixings need to be aligned with head rails, underlying studs and sole plates. The boards need to fit tightly between rails and studs and the unprinted foil surface facing the air cavity. Drive the helical stainless steel wall ties through the boards into the studs, in order of tying the timber framing to the brickwork. In order of making sure that the ties slope downward from the sheathing, ties should be inserted at around 10 to 20mm above the brick course. The insulation board should be covered with horizontal cavity barriers. This also implies installing both horizontal and vertical cavity barriers around doors and windows.
In case you are adding some cladding system such as render finish or tile hanging, it is advisable that a breather membrane is installed on top of the insulation boards.
Steel stud framed walls
If you are looking a lightweight, easy-to-build and reliable insulation product for steel stud framed walls in a commercial or industrial building, then what you need is Celotex GA 4000 wall board.
Once the steel stud framework has been installed, it is time to install the boards directly onto the external side of the steel frame. The boards should be temporarily fixed by using washers and self-taping screws. If required, cut and trim the boards prior to installation so they can fit around doors and windows. In case the frame needs to be faced with brickwork, make sure to fix wall tie retaining channels through the boards into the studs with adequate fasteners. The brickwork facing construction should include twist-in ties. Finally, if necessary, fit cavity barriers between the Celotex insulation boards and the brickwork.
For more info about Celotex GA4000 insulation boards contact us on live chat, call us on 02033972133 or send us an email at info@insulationshop.co.